DIY Halloween Costumes for Girls
Making DIY Halloween costumes for my girls is one of my favorite family traditions. Growing up, my mom made costumes for my siblings and me, and those memories are so special. I hope my girls will look back with the same fondness at the ones we’ve created together. From an Eiffel Tower to a flower pot, rainbow, painter, and nesting dolls, we’ve had some fun with our costumes!
Though they take more time than store-bought ones, I love making my girls’ costumes while they still let me. Each year brings a new creative challenge and a chance to make something together.
With a 6 and 2.5-year-old, it’s not just me designing anymore. Hearing my girls’ ideas is part of the fun, and I love bringing their visions to life! We’re going with another sisters’ costume this year, and I can’t wait to share what we’ve been scheming.
- NO SEW – You don’t have to be an expert seamstress to make a great DIY halloween costume for your littles. In fact, I made many of my girls costumes before I even had a sewing machine. You can make a great costume with just a hot glue gun, some felt, a can of spray paint, foam board or cardboard, and a quick a trip to your local Dollar Tree or craft store for some added embellishments.
- DIY PART, NOT ALL – You don’t have to craft every piece when making a homemade costume. Pull together some found items to save time and money and then add DIY elements to make it your own!
- HEART FELT – Felt is my go-to fabric for Halloween costumes for a couple of reasons. It is inexpensive, it has some weight to it, it is durable, easy to sew and very forgiving. Felt is also super easy to cut as long as you have a good pair of sewing scissors. I find felt by the yard at Walmart, Hobby Lobby, or Joann’s, and by the sheet at Michaels or Hobby Lobby.
- PLAN FOR WEATHER – Here in Chicago we have been known to experience ALLLL of the elements on Halloween from rain to high winds to snow, so I always design my girls halloween costumes with the ability to layer over regular clothes or winter warmwear, ultimately making sure it fits over a coat.
- DETAILS, DETAILS, DETAILS: I enjoy adding creative touches to the candy bag and headpiece for each year’s costume. It’s all in the details!
Here’s a stroll down memory lane with how I created some of my girls’ DIY Halloween costumes from years past…
Matryoshka Nesting Doll Costumes
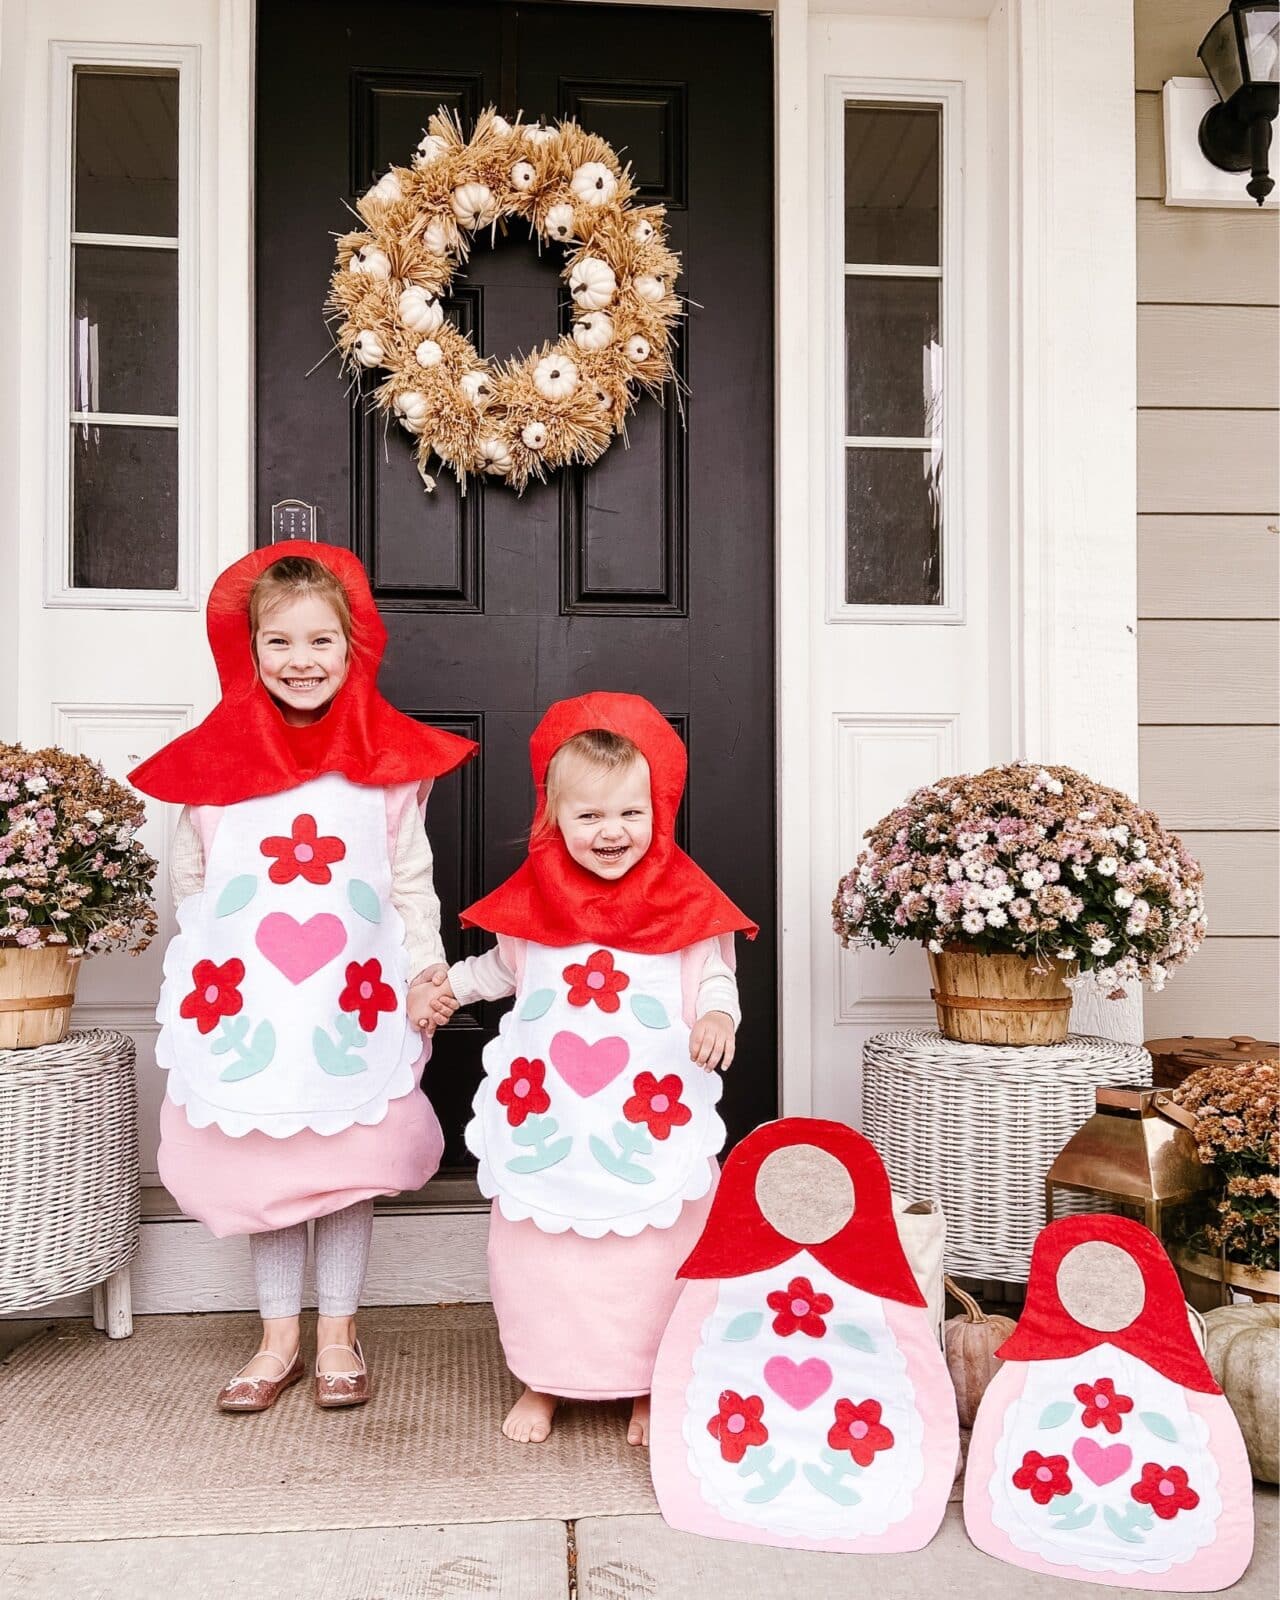
Last year my girls were nesting dolls for Halloween. Since I have just 2 daughters, I made them each a smaller doll to carry along as their candy bag so that we had a whole set to trick-or-treat with. Being that it was mid-pandemic, we didn’t end up trick-or-treating but we did have a backyard glow-in-the-dark egg hunt with our neighborhood friends and it was so much fun! If you are looking for other activities to do with small children other than trick-or-treating this is a great alternative!
These nesting doll costumes were constructed entirely of felt. First, to make the body shape, I traced the girls on pink felt and drew the doll shape with chalk. Once I had the outline how I wanted it, I cut it out twice. Next, I sewed each side up with a sewing machine and then flipped it inside out. Similarly, the headpiece was constructed using two pieces of felt stitched together and subsequently flipped inside out. To create the face, I traced a bowl to cut a small oval, gradually enlarging it until it fit perfectly.
Next, I cut out the apron shape and the flowers/motifs out of felt using sharp scissors. After arranging the pattern, I hot-glued it to the white felt apron and then attached the apron to the pink doll shape. In hindsight, fabric glue would have been better to prevent hot glue from seeping through the felt.
For the candy bags, I made smaller, one-sided versions of the costumes, hot-gluing them to doll-shaped foam board cut-outs for shape. You can attach the foam board dolls to totes or candy buckets with glue or wire.
Materials: Sewing machine, felt, hot glue gun, fabric glue, sewing scissors, foam board (backer if making mini dolls), a tote bag or plastic bucket (to glue the the mini doll to if using as a candy bucket)
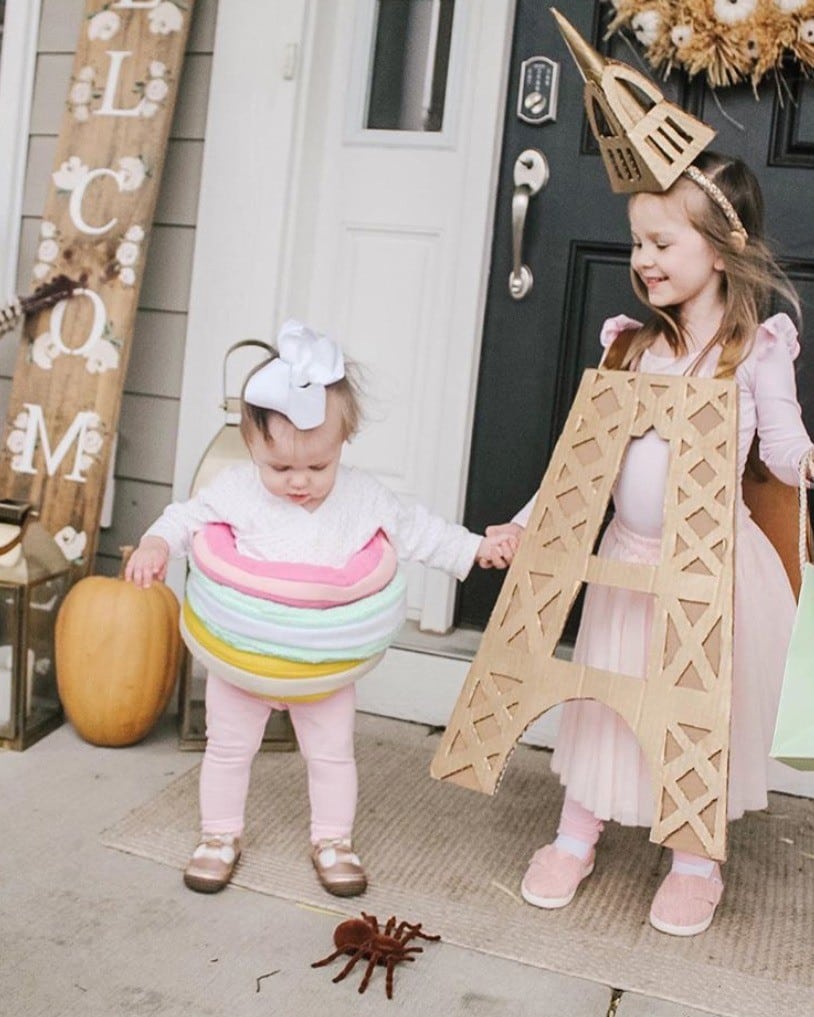
Eiffel Tower / Stack of Macarons Costumes
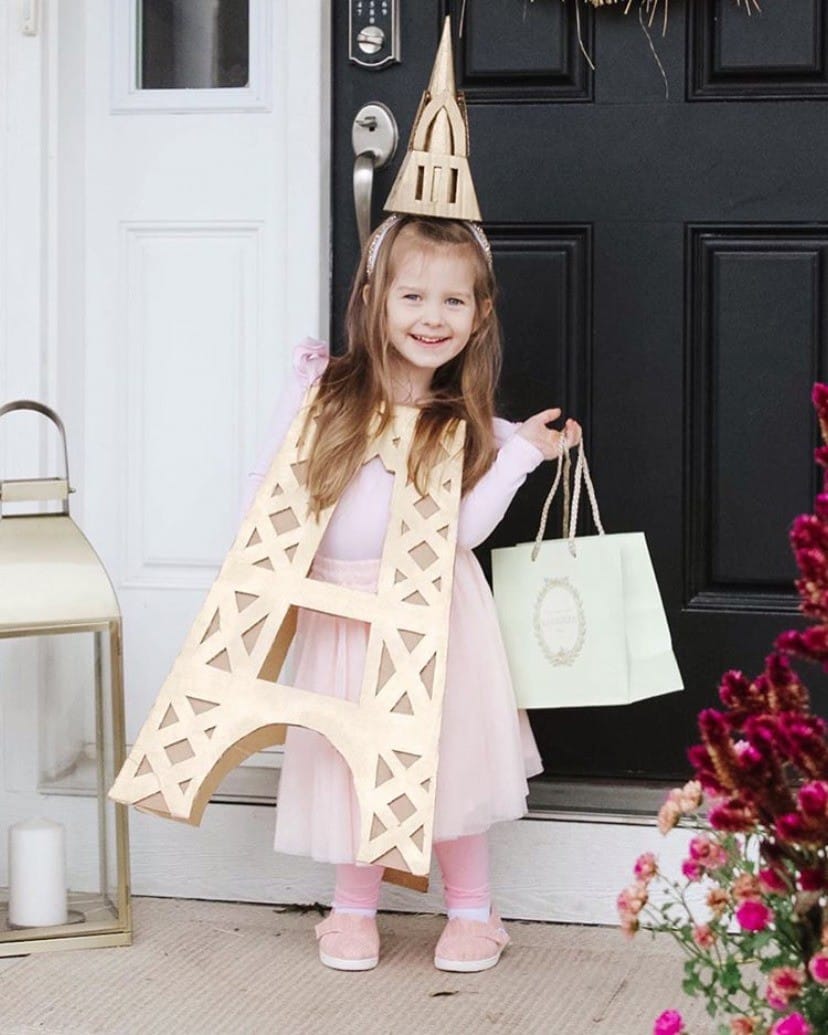
When I was pregnant with my oldest daughter, Josie, my husband and I took a babymoon to Paris. Since Josie has always loved our Eiffel Tower photos, I thought it would make a perfect costume for her. Naturally, baby sister had to complement the theme, so she became a stack of macarons!
To create the Eiffel Tower costume, I first sketched out the design in pencil. Then, I used an X-Acto knife to cut shapes into foam board, thus creating the iconic Eiffel Tower look. Once the cut-out was complete, I spray-painted it gold. Subsequently, to add dimension and strength, I attached the gold cut-out piece to a solid piece of kraft cardboard without cut-outs. I made two of these panels and, finally, used gold ribbon glued over elastic to create an apron-style costume.
I love making apron-style costumes for kids because they’re super easy to put on and take off, especially over warmwear. This design was both functional and eye-catching, making it a favorite among my DIY creations!
Willa’s macaron costume was inspired and adapted from this pattern.
I found Ladurée Paris totes on eBay for the candy bags, which tied the girls’ costumes together perfectly!
Materials: Eiffel Tower- Foam board, cardboard, exacto knife and extra blades, gold spray paint, gold ribbon, elastic, hot glue gun, kraft paper cone for head piece. Macarons – felt, sewing machine, hot glue gun, poly fill, sewing scissors
Toddler Rainbow Costume
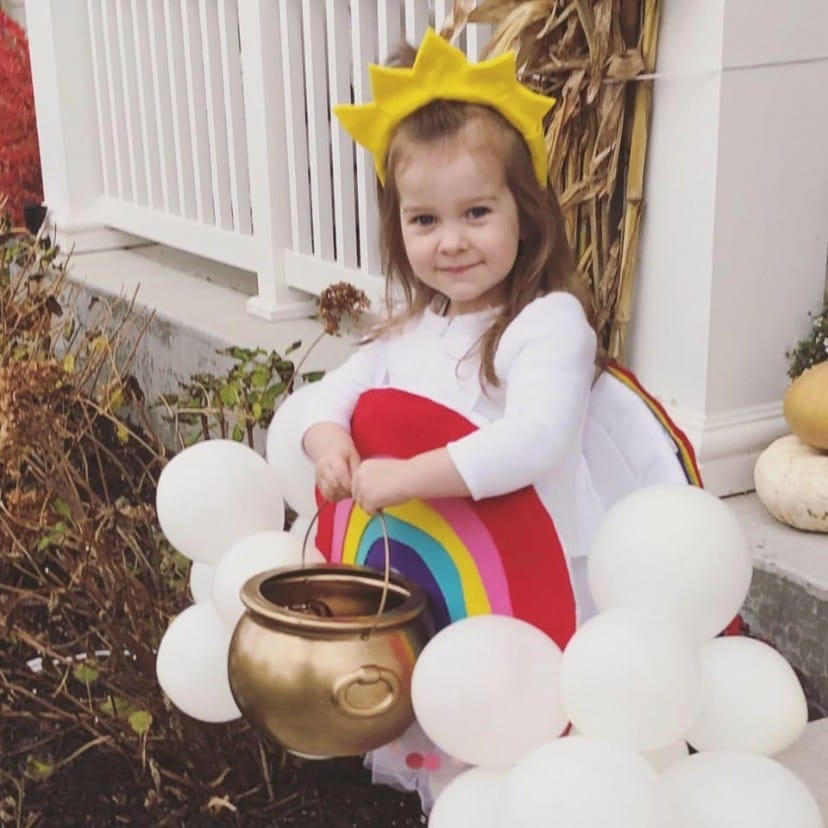
Another example of my signature apron-style is my rainbow costume. For this no-sew costume, I attached felt rainbow pieces to a foam board base with hot glue. Next, I added white balloons to form clouds, which elevated the costume and made it more fun for my toddler to wear!
For the headpiece, I made a sun-shaped headband out of scrap felt and a plain Dollar Tree headband. To make a pot of gold bucket for our candy bag, I spray painted a black cauldron gold, as it was easy to find this time of year.
Materials: Foam board for rainbow base, rainbow colored felt, hot glue gun, white balloons, black cauldron bucket, gold spray paint, sewing scissors, white ribbon or elastic
Toddler Flower Pot Costume
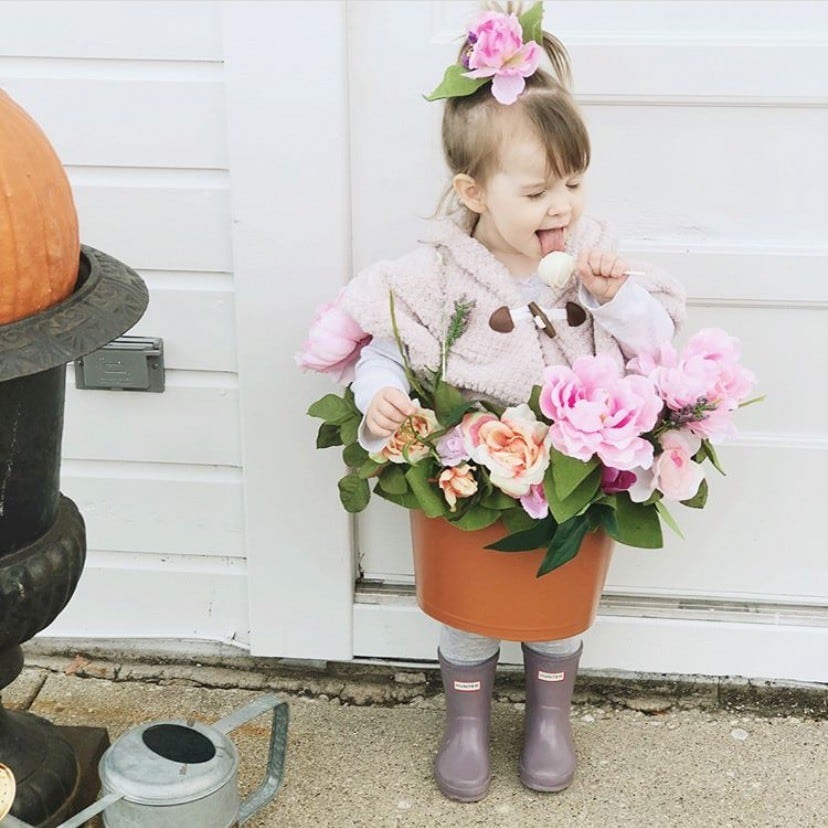
Probably my most popular costume to date, this flower pot costume was made using a black plastic flower pot and terra cotta spray paint, giving it the look of terra cotta without the weight.
I cut off the bottom of the pot, spray-painted it, and hot-glued faux flowers around the inside. I also drilled holes on each side to string ribbon through, which tied around my daughter’s shoulders to hold it up. For added dimension, I cut extra leaves from green felt.
To complete the look, Josie wore rain boots, a floral hair clip, and used a watering can to collect candy.
Materials: Plastic flower pot large enough to fit your child, terra cotta colored spray paint, faux flowers, green felt for extra leaves, hot glue gun, ribbon or elastic, clip for matching floral hair piece.
Toddler Painter Costume
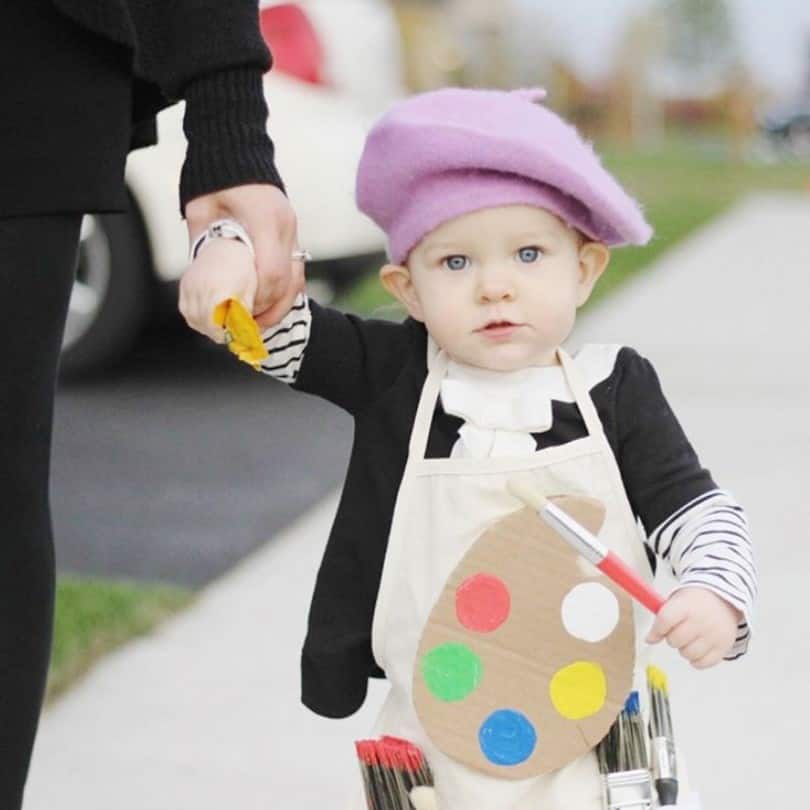
This painter costume was such an easy DIY with lots of found elements. I added a white felt collar to a black t-shirt and layered it over a striped long sleeve shirt. Next, I purchased a canvas child sized apron, an empty silver paint can, and some Dollar Tree paint brushes.
To DIY, I cut cardboard into a paint palette shape, pre-painted it and the brushes, and let them dry for a few days. Josie wore a beret for the headpiece and walked around with an empty paint can for a candy bucket. (Ok, I did. She only wanted to hold that brush!)
Materials: Striped shirt, black t-shirt, white felt, cardboard, paintbrushes, acrylic paint, beret, child sized apron, paint bucket

Newborn Ice Cream “I Scream” Cone Costume
With a newborn at Halloween, I loved the idea of making a onesie and swaddle based costume. Clearly, I was the only one! We jokingly called it the “I Scream Cone” and it’s a baby book classic! The sprinkles were made by rolling felt strips, hot-gluing the ends, and then hand-sewing them onto the onesie. I fashioned the cone swaddle out of tan felt and stitched the waffle cone pattern with embroidery thread. To make the “scoop” tutu, I followed a no-sew tutorial similar to this one.
Materials: White onesie, felt, embroidery thread, tulle, large red pompom, glue gun, green pipe cleaner, nylon headband
I hope you enjoyed this walk through my girls DIY Halloween costumes and trip down memory lane with me! Let me know which costume was your favorite below in the comments! Any guesses (or wishes) as to what we might be next?!

